Tampilkan postingan dengan label Ionic Javascript Components. Tampilkan semua postingan

Jumat, 11 Agustus 2017

Ionic - Tabs

Tabs are a useful pattern for any navigation type or selecting different pages inside your app. The same tabs will appear at the top of the screen for Android devices and at the bottom for IOS devices.

Using Tabs

Tabs can be added to the app by using ion-tabs as a container element and ion-tab as a content element. We will add it to the index.html, but you can add it to any HTML file inside your app. Just be sure not to add it inside the ion-content to avoid CSS issues that comes with it.

index.html Code

<ion-tabs class = "tabs-icon-only">

   <ion-tab title = "Home" icon-on = "ion-ios-filing" 
      icon-off = "ion-ios-filing-outline"></ion-tab>

   <ion-tab title = "About" icon-on = "ion-ios-home" 
      icon-off = "ion-ios-home-outline"></ion-tab>

   <ion-tab title = "Settings" icon-on = "ion-ios-star" 
      icon-off = "ion-ios-star-outline"></ion-tab>

</ion-tabs>
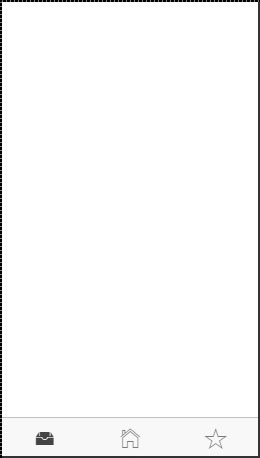
The output will look as shown in the following screenshot.
Ionic Javascript Tabs
There is API available for ion-tab elements. You can add it as attributes as showed in example above where we used title, icon-on and icon-off. The last two are used to differentiate selected tab from the rest of it. If you look at the image above, you can see that first tab is selected. You can check the rest of the attributes in the following table.

Tab Attributes

AttributeTypeDetails
titlestringThe title of the tab.
hrefstringThe link used for tab navigation.
iconstringThe icon of the tab.
icon-onstringThe icon of the tab when selected.
icon-offstringThe icon of the tab when not selected.
badgeexpressionThe badge for the tab.
badge-styleexpressionThe badge style for the tab.
on-selectexpressionCalled when tab is selected
on-deselectexpressionCalled when tab is deselected
hiddenexpressionUsed to hide the tab.
disabledexpressionUsed to disable the tab.
Tabs also have its own delegate service for easier control of all the tabs inside the app. It can be injected in the controller and has several methods, which are shown in the following table.

Delegate Methods

MethodParametersTypeDetails
selectedIndex()/numberReturns the index of the selected tab.
$getByHandle(parameter1)handlestring
Used to connect methods to the particular tab view with the same handle. Handle can be added to ion-tabs by usingdelegate-handle = "my-handle" attribute.
$ionicTabsDelegate.$getByHandle('my-handle').selectedIndex();

Ionic - JavaScript Slide Box

A Slide box contains pages that can be changed by swiping the content screen.

Using Slide Box

The usage of the slide box is simple. You just need to add ion-slide-box as a container and ion-slide with box class inside that container. We will add height and border to our boxes for better visibility.

HTML Code

<ion-slide-box>

   <ion-slide>
      <div class = "box box1">
         <h1>Box 1</h1>
      </div>
   </ion-slide>

   <ion-slide>
      <div class = "box box2">
         <h1>Box 2</h1>
      </div>
   </ion-slide>

   <ion-slide>
      <div class = "box box3">
         <h1>Box 3</h1>
      </div>
   </ion-slide>

</ion-slide-box>

.box1, box2, box3 {
   height: 300px;
   border: 2px solid blue;
}
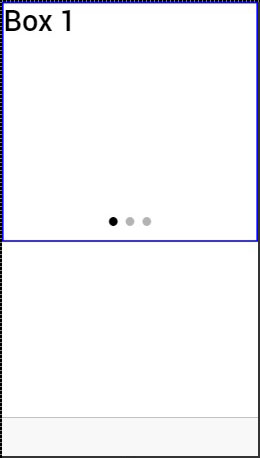
The Output will look as shown in the following screenshot −
Ionic Javascript Slide Box 1
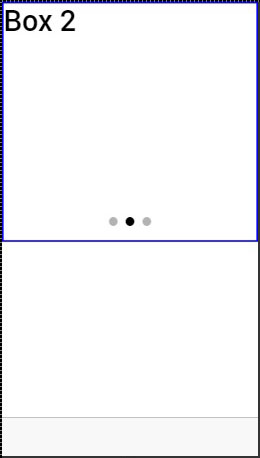
We can change the box by dragging the content to the right. We can also drag to the left to show the previous box.
Ionic Javascript Slide Box 2
A few attributes that can be used for controlling slide box behavior are mentioned in the following table.

Delegate Methods

AttributeTypeDetails
does-continueBooleanShould slide box loop when first or last box is reached.
auto-playBooleanShould slide box automatically slide.
slide-intervalnumberTime value between auto slide changes in milliseconds. Default value is 4000.
show-pagerBooleanShould pager be visible.
pager-clickexpressionCalled when a pager is tapped (if pager is visible). $index is used to match with different slides.
on-slide-changedexpressionCalled when slide is changed. $index is used to match with different slides.
active-slideexpressionUsed as a model to bind the current slide index to.
delegate-handlestringUsed for slide box identification with $ionicSlideBoxDelegate.

Slide Box Delegate

The $ionicSlideBoxDelegate is a service used for controlling all slide boxes. We need to inject it to the controller.

Controller Code

.controller('MyCtrl', function($scope, $ionicSlideBoxDelegate) {
   $scope.nextSlide = function() {
      $ionicSlideBoxDelegate.next();
   }
})

HTML Code

<button class = "button button-icon icon ion-navicon" ng-click = "nextSlide()"></button>
The following table shows $ionicSlideBoxDelegate methods.

Delegate Methods

MethodParametersTypeDetails
slide(parameter1, parameter2)to, speednumber, numberParameter to represents the index to slide to. speed determines how fast is the change in milliseconds.
enableSlide(parameter1)shouldEnablebooleanUsed for enambling or disabling sliding.
previous(parameter1)speednumberThe value in miliseconds the change should take.
stop()//Used to stop the sliding.
start()//Used to start the sliding.
currentIndex()/numberReturns index of the curent slide.
slidesCount()/numberReturns total number of the slides.
$getByHandle(parameter1)handlestring
Used to connect methods to the particular slide box with the same handle.
$ionicSlideBoxDelegate.$getByHandle ('my-handle').start();

Ionic - JavaScript Side Menu

Side menu is one of the most used Ionic components. The Side menu can be opened by swiping to the left or right or by triggering the button created for that purpose.

Using Side Menu

The first element that we need is ion-side-menus. This element is used for connecting the side menu with all the screens that will use it. The ion-side-menu-content element is where the content will be placed and the ion-side-menu element is the place where we can put a side directive. We will add the side menu to the index.html and place the ion-nav-view inside the side menu content. This way the side menu can be used throughout entire app.

index.html

<ion-side-menus>

   <ion-side-menu>side = "left">
      <h1>SIde Menu</h1>
   </ion-side-menu>

   <ion-side-menu-content>
      <ion-nav-view>
      </ion-nav-view>
   </ion-side-menu-content>

</ion-side-menus>
Now, we will create button with menu-toggle = "left" directive. This button will usually be placed in the apps header bar, but we will add it in our template file for better understanding.
When the button is tapped or when we swipe to the right, the side menu will open. You could also set the menu-close directive, if you would like to have one button only for closing side menu, but we will use the toggle button for this.

HTML Template

<button menu-toggle = "left" class = "button button-icon icon ion-navicon"></button>
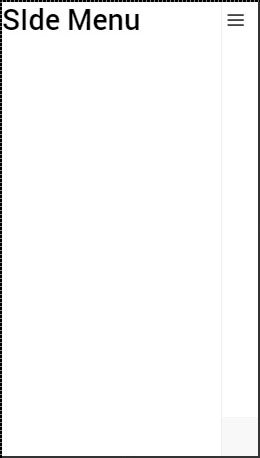
The above code will produce the following screen −
Ionic Javascript Side Menu
You can add some additional attributes to the ion-side-menus element. The enable-menu-with-back-views can be set to false to disable side menu, when the back button is showed. This will also hide the menu-toggle button from the header. The other attribute is delegate-handle, which will be used for the connection with $ionicSideMenuDelegate.
The ion-side-menu-content element can use its own attribute. When the drag-content attribute is set to false, it will disable the ability to open the side menu by swiping the content screen. The edge-drag-threshold attribute has a default value of 25. This means that swiping is allowed only 25 pixels from the left and right edge of the screen. We can change this number value or we can set it to false to enable swiping on the entire screen or true to disable it.
The ion-side-menu can use the side attribute that we showed in the example above. It will determine whether the menu should appear from the left or the right side. The ‘is-enabled’ attribute with a false value will disable the side menu, and the width attribute value is a number that represents how wide the side menu should be. The default value is 275.

Side Menu Delegate

The $ionicSideMenuDelegate is a service used for controlling all the side menus in the app. We will show you how to use it, and then we will go through all the options available. Like all the Ionic services, we need to add it as a dependency to our controller and then use it inside the controller’s scope. Now, when we click the button, all of the side menus will open.

Controller Code

.controller('MyCtrl', function($scope, $ionicSideMenuDelegate) {
   $scope.toggleLeftSideMenu = function() {
      $ionicSideMenuDelegate.toggleLeft();
   };
})

HTML Code

<button class = "button button-icon icon ion-navicon" ng-click = "toggleLeft()"></button>
The following table shows the $ionicScrollDelegate methods.

Delegate Methods

MethodParametersTypeDetails
toggleLeft(parameter)isOpenBooleanUsed for opening or closing side menu.
toggleRight(parameter)isOpenBooleanUsed for opening or closing side menu.
getOpenRatio()//Returns ratio of open part over menu width. If half of the menu is open from the left, the ration will be 0.5. If side menu is closed, it will return 0. If half of the menu is open from the right side, it will return -0.5.
isOpen()/BooleanReturns true if side menu is open, false if it is closed.
isOpenLeft()/BooleanReturns true if left side menu is open, false if it is closed.
isOpenRight()/BooleanReturns true if right side menu is open, false if it is closed.
getScrollPosition()//Returns object with two number as properties: leftand right. These numbers represent the distance the user has scrolled from the left and from the top respectively.
canDragContent(parameter1)canDragBooleanWhether the content can be dragged to open side menu.
edgeDragThreshold(parameter1)valueBoolean|numberIf the value is true, the side menu can be opened by dragging 25px from the edges of the screen. If it is false, dragging is disabled. We can set any number that will represent pixel value from the left and right edge of the screen.
$getByHandle(parameter1)handlestring
Used to connect methods to the particular side menu view with the same handle.
$ionicSideMenuDelegate. $getByHandle('my-handle').toggleLeft();

Ionic - JavaScript Scroll

The element used for scrolling manipulation in ionic apps is called as the ion-scroll.

Using Scroll

The following code snippets will create scrollable containers and adjust scrolling patterns. First, we will create our HTML element and add properties to it. We will add → direction = "xy" to allow scrolling to every side. We will also set the width and the height for the scroll element.

HTML Code

<ion-scroll zooming = "true" direction = "xy" style = "width: 320px; height: 500px">
   <div class = "scroll-container"></div>
</ion-scroll>
Next, we will add the image of our world map to div element, which we created inside the ion-scroll and set its width and height.

CSS Code

.scroll-container {
   width: 2600px;
   height: 1000px;
   background: url('../img/world-map.png') no-repeat
}
When we run our app, we can scroll the map in every direction. The following example shows the North America part of the map.

Ionic Javascript Scroll Start
We can scroll this map to any part that we want. Let us scroll it to show Asia.

Ionic Javascript Scroll End
There are other attributes, which can be applied to the ion-scroll. You can check them in the following table.

Scroll Attributes

AttributeTypeDetails
directionstringPossible directions of the scroll. Default value is y
delegate-handlestringUsed for scroll identification with $ionicScrollDelegate.
lockingbooleanUsed to lock scrolling in one direction at a time. Default value is true.
pagingbooleanUsed to determine if the paging will be used with scroll.
on-refreshexpressionCalled on pull-to-refresh.
on-scrollexpressionCalled when scrolling.
scrollbar-xbooleanShould horizontal scroll bar be shown. Default value is true.
scrollbar-ystringShould vertical scroll bar be shown. Default value is true.
zoomingbooleanUsed to apply pinch-to-zoom.
min-zoomintegerMinimal zoom value.
max-zoomintegerMaximal zoom value.
scrollbar-xbooleanUsed to enable bouncing. Default value on IOS is true, on Android false.

Infinite Scroll

An Infinite scroll is used to trigger some behavior when scrolling passes the bottom of the page. The following example shows how this works. In our controller, we created a function for adding items to the list. These items will be added when a scroll passes 10% of the last element loaded. This will continue until we hit 30 loaded elements. Every time loading is finished, on-infinite will broadcast scroll.infiniteScrollComplete event.

HTML Code

<ion-list>
   <ion-item ng-repeat = "item in items" item = "item">Item {{ item.id }}</ion-item>
</ion-list>

<ion-infinite-scroll ng-if = "!noMoreItemsAvailable" on-infinite = "loadMore()" 
   distance = "10%"></ion-infinite-scroll>

Controller Code

.controller('MyCtrl', function($scope) {
   $scope.items = [];
   $scope.noMoreItemsAvailable = false;
   
   $scope.loadMore = function() {
      $scope.items.push({ id: $scope.items.length}); 

      if ($scope.items.length == 30) {
         $scope.noMoreItemsAvailable = true;
      }

      $scope.$broadcast('scroll.infiniteScrollComplete');
   };
})
Other attributes can also be used with ion-infinite-scroll. Some of them are listed in the table below.

Scroll Attributes

AttributeTypeDetails
on-infiniteexpressionWhat should be called when scrolled to the bottom.
distancestringThe distance from the bottom needed to trigger on-infinite expression.
spinnerstringWhat spinner should be shown while loading
immediate-checkBooleanShould ‘on-infinite’ be called when screen is loaded

Scroll Delegate

Ionic offers delegate for full control of the scroll elements. It can be used by injecting a $ionicScrollDelegate service to the controller, and then use the methods it provides.
The following example shows a scrollable list of 20 objects.

HTML Code

<div class = "list">
   <div class = "item">Item 1</div>
   <div class = "item">Item 2</div>
   <div class = "item">Item 3</div>
   <div class = "item">Item 4</div>
   <div class = "item">Item 5</div>
   <div class = "item">Item 6</div>
   <div class = "item">Item 7</div>
   <div class = "item">Item 8</div>
   <div class = "item">Item 9</div>
   <div class = "item">Item 10</div>
   <div class = "item">Item 11</div>
   <div class = "item">Item 12</div>
   <div class = "item">Item 13</div>
   <div class = "item">Item 14</div>
   <div class = "item">Item 15</div>
   <div class = "item">Item 16</div>
   <div class = "item">Item 17</div>
   <div class = "item">Item 18</div>
   <div class = "item">Item 19</div>
   <div class = "item">Item 20</div>
</div>

<button class = "button" ng-click = "scrollTop()">Scroll to Top!</button>

Controller Code

.controller('DashCtrl', function($scope, $ionicScrollDelegate) {

   $scope.scrollTop = function() {
      $ionicScrollDelegate.scrollTop();
   };
})   
The above code will produce the following screen −
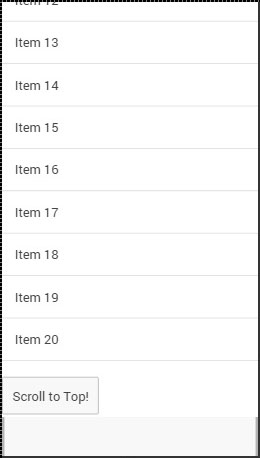
Ionic Javascript Scroll Bottom
When we tap the button, the scroll will be moved to the top.
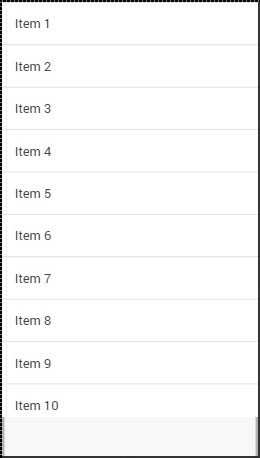
Ionic Javascript Scroll Top
Now, we will go through all of the $ionicScrollDelegate methods.

Delegate Methods

MethodParametersTypeDetails
scrollTop(parameter)shouldAnimatebooleanShould scroll be animated.
scrollBottom(parameter)shouldAnimatebooleanShould scroll be animated.
scrollTo(parameter1, parameter2, parameter3)left, top, shouldAnimatenumber, number, integerFirst two parameters determine value of the x, and y-axis offset.
scrollBy(parameter1, parameter2, parameter3)left, top, shouldAnimatenumber, number, integerFirst two parameters determine value of the x, and y-axis offset.
zoomTo(parameter1, parameter2, parameter3, parameter4)level, animate, originLeft, originTopnumber, boolean, number, numberlevel is used to determine level to zoom to. originLeft and originRightcoordinates where the zooming should happen.
zoomBy(parameter1, parameter2, parameter3, parameter4)factor, animate, originLeft, originTopnumber, boolean, number, numberfactor is used to determine factor to zoom by. originLeft and originRightcoordinates where the zooming should happen.
getScrollPosition()//Returns object with two number as properties: left and right. These numbers represent the distance the user has scrolled from the left and from the top respectively.
anchorScroll(parameter1)shouldAnimatebooleanIt will scroll to the element with the same id as the window.loaction.hash. If this element does not exist, it will scroll to the top.
freezeScroll(parameter1)shouldFreezebooleanUsed to disable scrolling for particular scroll.
freezeAllScrolls(parameter1)shouldFreezebooleanUsed to disable scrolling for all the scrolls in the app.
getScrollViews()/objectReturns the scrollView object.
$getByHandle(parameter1)handlestring
Used to connect methods to the particular scroll view with the same handle.
$ionicScrollDelegate. $getByHandle('my-handle').scrollTop();