Jumat, 11 Agustus 2017

Ionic - Cordova Camera

The Cordova camera plugin uses the native camera for taking pictures or getting images from the image gallery.

Using Camera

Open your project root folder in command prompt, then download and install the Cordova camera plugin with the following command.
C:\Users\Username\Desktop\MyApp> cordova plugin add org.apache.cordova.camera
Now, we will create a service for using a camera plugin. We will use the AngularJS factory and promise object $q that needs to be injected to the factory.

services.js Code

.factory('Camera', function($q) {

   return {
      getPicture: function(options) {
         var q = $q.defer();

         navigator.camera.getPicture(function(result) {
            q.resolve(result);
         }, function(err) {
            q.reject(err);
         }, options);

         return q.promise;
      }
   }
});
To use this service in the app, we need to inject it to a controller as a dependency. Cordova camera API provides the getPicture method, which is used for taking photos using a native camera.
The native camera settings can be additionally customized by passing the options parameter to the takePicture function. Copy the above-mentioned code sample to your controller to trigger this behavior. It will open the camera application and return a success callback function with the image data or error callback function with an error message. We will also need two buttons that will call the functions we are about to create and we need to show the image on the screen.

HTML Code

<button class = "button" ng-click = "takePicture()">Take Picture</button>
<button class = "button" ng-click = "getPicture()">Open Gallery</button>
<img ng-src = "{{user.picture}}">

Controller Code

.controller('MyCtrl', function($scope, Camera) {

   $scope.takePicture = function (options) {
 
      var options = {
         quality : 75,
         targetWidth: 200,
         targetHeight: 200,
         sourceType: 1
      };

      Camera.getPicture(options).then(function(imageData) {
         $scope.picture = imageData;;
      }, function(err) {
         console.log(err);
      });
  
   };
})
The output will look as shown in the following screenshot.

Ionic Cordova Camera
If you want to use images from your gallery, the only thing you need to change is the sourceType method from your options parameter. This change will open a dialog popup instead of camera and allow you to choose the image you want from the device.
You can see the following code, where the sourceType option is changed to 0. Now, when you tap the second button, it will open the file menu from the device.

Controller Code

.controller('MyCtrl', function($scope, Camera) {

   $scope.getPicture = function (options) {
 
      var options = {
         quality : 75,
         targetWidth: 200,
         targetHeight: 200,
         sourceType: 0
      };

      Camera.getPicture(options).then(function(imageData) {
         $scope.picture = imageData;;
      }, function(err) {
         console.log(err);
      });
   };  
})
The output will look as shown in the following screenshot.
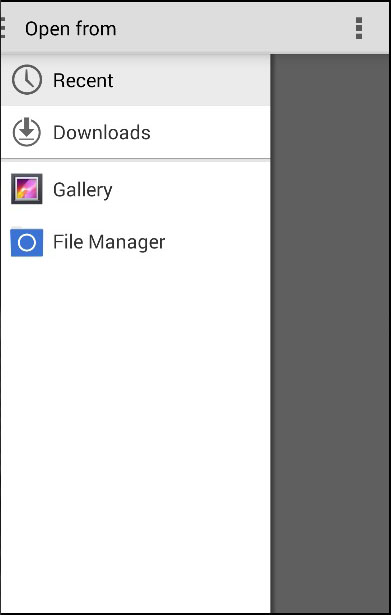
Ionic Cordova Camera Gallery
When you save the image you took, it will appear on the screen. You can style it the way you want.
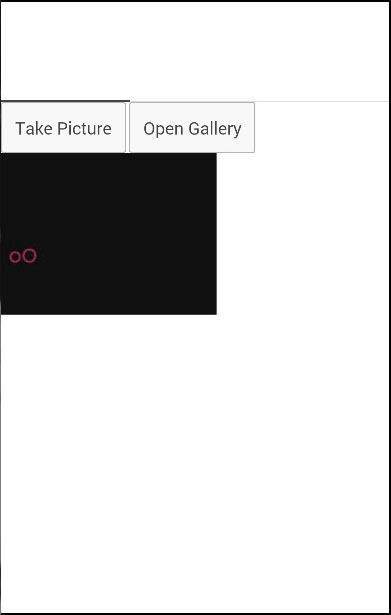
Ionic Cordova Camera Image
Several other options can be used as well, some of which are given in the following table.
ParameterTypeDetails
qualityNumberThe quality of the image, range 0-100
destinationTypeNumberFormat of the image.
sourceTypeNumberUsed for setting the source of the picture.
allowEditbooleanUsed for allowing editing of the image.
encodingTypeNumberValue 0 will set JPEG, and value 1 will set PNG.
targetWidthNumberUsed for scaling image width.
targetHeightNumberUsed for scaling image height.
mediaTypestringUsed for setting the media type.
cameraDirectionNumberValue 0 will set the back camera, and value 1 will set the front camera.
popoverOptionsstringIOS-only options that specify popover location in iPad.
saveToPhotoAlbumbooleanUsed for saving image to photo album.
correctOrientationbooleanUsed for correcting orientation of the captured images.

Ionic - Cordova AdMob

The Cordova AdMob plugin is used for integrating ads natively. We will use the admobpro plugin in this chapter, since the admob is deprecated.

Using AdMob

To be able to use ads in your app, you need to sign up to admob and create a banner. When you do this, you will get an Ad Publisher ID. Since these steps are not a part of the Ionic framework, we will not explain it here. You can follow the steps by Google support team here.
You will also need to have android or iOS platform installed, since the cordova plugins work only on native platforms. We have already discussed how to do this in our environment setup chapter.
The AdMob plugin can be installed in the command prompt window.
C:\Users\Username\Desktop\MyApp> cordova plugin add cordova-plugin-admobpro
Now that we have installed the plugin, we need to check if the device is ready before we are able to use it. This is why we need to add the following code in the $ionicPlatform.ready function inside the app.js.
if( ionic.Platform.isAndroid() )  { 
   admobid = { // for Android
      banner: 'ca-app-pub-xxx/xxx' // Change this to your Ad Unit Id for banner...
   };

   if(AdMob) 
      AdMob.createBanner( {
         adId:admobid.banner, 
         position:AdMob.AD_POSITION.BOTTOM_CENTER, 
         autoShow:true
      } );
}
The output will look as shown in the following screenshot.
Ionic Cordova Admob
The same code can be applied for iOS or a Windows Phone. You will only use a different id for these platforms. Instead of a banner, you can use interstitial ads that will cover entire screen.

AdMob Methods

The following table shows methods that can be used with admob.
MethodparametersDetails
createBanner(parameter1, parameter2, parameter3)adId/options, success, failUsed for creating the banner.
removeBanner()/Used for removing the banner.
showBanner(parameter1)positionUsed for showing the banner.
showBannerAtXY(parameter1, parameter2)x, yUsed for showing the banner at specified location.
hideBanner();/Used for hiding the banner.
prepareInterstitial(parameter1, parameter2, parameter3)adId/options, success, failUsed for preparing interstitial.
showInterstitial();/Used for showing interstitial.
setOptions(parameter1, parameter2, parameter3)options, success, failUsed for setting the default value for other methods.

AdMob Events

The following table shows the events that can be used with admob.
EventDetails
onAdLoadedCalled when the ad is loaded.
onAdFailLoadCalled when the ad is failed to load.
onAdPresentCalled when the ad will be showed on screen.
onAdDismissCalled when the ad is dismissed.
onAdLeaveAppCalled when the user leaves the app by clicking the ad.
You can handle these events by following the example below.
document.addEventListener('onAdLoaded', function(e){
   // Handle the event...
});

Ionic - Cordova Integration

Cordova offers ngCordova, which is set of wrappers specifically designed to work with AngularJS.

Installing ngCordova

When you the start Ionic app, you will notice that it is using bower. It can be used for managing ngCordova plugins. If you have bower installed skip this step, if you do not have it, then you can install it in the command prompt window.
C:\Users\Username\Desktop\MyApp> npm install -g bower
Now we need to install ngCordova. Open your app in the command prompt window. The following example is used for the app that is located on the desktop and is named MyApp.
C:\Users\Username\Desktop\MyApp> bower install ngCordova
Next, we need to include ngCordova to our app. Open index.html file and add the following scripts. It is important to add these scripts before cordova.jsand after ionic scripts.
<script src = "lib/ngCordova/dist/ng-cordova.js"></script>
Now, we need to inject ngCordova as angular dependency. Open your app.js file and add the ngCordova to angular module. If you have used one of the Ionic template apps, you will notice that there is injected ionic, controllers and services. In that case, you will just add ngCordova at the end of the array.
angular.module('myApp', ['ngCordova'])
You can always check the plugins that are already installed by typing the following command.
C:\Users\Username\Desktop\MyApp> cordova plugins ls

Ionic - Tabs

Tabs are a useful pattern for any navigation type or selecting different pages inside your app. The same tabs will appear at the top of the screen for Android devices and at the bottom for IOS devices.

Using Tabs

Tabs can be added to the app by using ion-tabs as a container element and ion-tab as a content element. We will add it to the index.html, but you can add it to any HTML file inside your app. Just be sure not to add it inside the ion-content to avoid CSS issues that comes with it.

index.html Code

<ion-tabs class = "tabs-icon-only">

   <ion-tab title = "Home" icon-on = "ion-ios-filing" 
      icon-off = "ion-ios-filing-outline"></ion-tab>

   <ion-tab title = "About" icon-on = "ion-ios-home" 
      icon-off = "ion-ios-home-outline"></ion-tab>

   <ion-tab title = "Settings" icon-on = "ion-ios-star" 
      icon-off = "ion-ios-star-outline"></ion-tab>

</ion-tabs>
The output will look as shown in the following screenshot.
Ionic Javascript Tabs
There is API available for ion-tab elements. You can add it as attributes as showed in example above where we used titleicon-on and icon-off. The last two are used to differentiate selected tab from the rest of it. If you look at the image above, you can see that first tab is selected. You can check the rest of the attributes in the following table.

Tab Attributes

AttributeTypeDetails
titlestringThe title of the tab.
hrefstringThe link used for tab navigation.
iconstringThe icon of the tab.
icon-onstringThe icon of the tab when selected.
icon-offstringThe icon of the tab when not selected.
badgeexpressionThe badge for the tab.
badge-styleexpressionThe badge style for the tab.
on-selectexpressionCalled when tab is selected
on-deselectexpressionCalled when tab is deselected
hiddenexpressionUsed to hide the tab.
disabledexpressionUsed to disable the tab.
Tabs also have its own delegate service for easier control of all the tabs inside the app. It can be injected in the controller and has several methods, which are shown in the following table.

Delegate Methods

MethodParametersTypeDetails
selectedIndex()/numberReturns the index of the selected tab.
$getByHandle(parameter1)handlestring
Used to connect methods to the particular tab view with the same handle. Handle can be added to ion-tabs by usingdelegate-handle = "my-handle" attribute.
$ionicTabsDelegate.$getByHandle('my-handle').selectedIndex();

Ionic - JavaScript Slide Box

A Slide box contains pages that can be changed by swiping the content screen.

Using Slide Box

The usage of the slide box is simple. You just need to add ion-slide-box as a container and ion-slide with box class inside that container. We will add height and border to our boxes for better visibility.

HTML Code

<ion-slide-box>

   <ion-slide>
      <div class = "box box1">
         <h1>Box 1</h1>
      </div>
   </ion-slide>

   <ion-slide>
      <div class = "box box2">
         <h1>Box 2</h1>
      </div>
   </ion-slide>

   <ion-slide>
      <div class = "box box3">
         <h1>Box 3</h1>
      </div>
   </ion-slide>

</ion-slide-box>

.box1, box2, box3 {
   height: 300px;
   border: 2px solid blue;
}
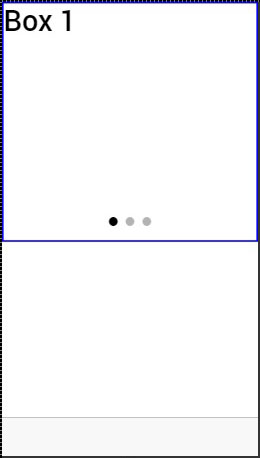
The Output will look as shown in the following screenshot −
Ionic Javascript Slide Box 1
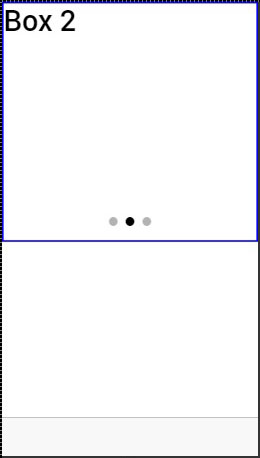
We can change the box by dragging the content to the right. We can also drag to the left to show the previous box.
Ionic Javascript Slide Box 2
A few attributes that can be used for controlling slide box behavior are mentioned in the following table.

Delegate Methods

AttributeTypeDetails
does-continueBooleanShould slide box loop when first or last box is reached.
auto-playBooleanShould slide box automatically slide.
slide-intervalnumberTime value between auto slide changes in milliseconds. Default value is 4000.
show-pagerBooleanShould pager be visible.
pager-clickexpressionCalled when a pager is tapped (if pager is visible). $index is used to match with different slides.
on-slide-changedexpressionCalled when slide is changed. $index is used to match with different slides.
active-slideexpressionUsed as a model to bind the current slide index to.
delegate-handlestringUsed for slide box identification with $ionicSlideBoxDelegate.

Slide Box Delegate

The $ionicSlideBoxDelegate is a service used for controlling all slide boxes. We need to inject it to the controller.

Controller Code

.controller('MyCtrl', function($scope, $ionicSlideBoxDelegate) {
   $scope.nextSlide = function() {
      $ionicSlideBoxDelegate.next();
   }
})

HTML Code

<button class = "button button-icon icon ion-navicon" ng-click = "nextSlide()"></button>
The following table shows $ionicSlideBoxDelegate methods.

Delegate Methods

MethodParametersTypeDetails
slide(parameter1, parameter2)to, speednumber, numberParameter to represents the index to slide to. speed determines how fast is the change in milliseconds.
enableSlide(parameter1)shouldEnablebooleanUsed for enambling or disabling sliding.
previous(parameter1)speednumberThe value in miliseconds the change should take.
stop()//Used to stop the sliding.
start()//Used to start the sliding.
currentIndex()/numberReturns index of the curent slide.
slidesCount()/numberReturns total number of the slides.
$getByHandle(parameter1)handlestring
Used to connect methods to the particular slide box with the same handle.
$ionicSlideBoxDelegate.$getByHandle ('my-handle').start();