Jumat, 11 Agustus 2017

Ionic - Cordova Icon and Splash Screen

Every mobile app needs an icon and splash screen. Ionic provides excellent solution for adding it and requires minimum work for the developers. Cropping and resizing is automated on the Ionic server.

Adding Splash Screen and Icon

In the earlier chapters, we have discussed how to add different platforms for the Ionic app. By adding a platform, Ionic will install Cordova splash screen plugin for that platform so we do not need to install anything afterwards. All we need to do is to find two images.
The images should be pngpsd or ai files. The minimum dimension should be 192x192 for icon image and 2208×2208 for the splash screen image. This dimensions will cover all the devices. In our example, we will use the same image for both. The images need to be saved to resources folder instead of the default ones. After we are done with it, all we need is to run the following in the command prompt window.
C:\Users\Username\Desktop\MyApp>ionic resources
Now, if you check resources/android or resources/ios folders, you will see that the images we added before are resized and cropped to accommodate different screen sizes. When we run our app on the device, we will see a splash screen before the app is started and we will see that a default Ionic icon is changed.
Ionic Cordova Splash Screen
Ionic Cordova Icon
NOTE − If you want to use different images for Android and iOS, you can add it to resources/android and resources/ios instead of the resourcesfolder.

Ionic - Cordova Media

This plugin allows us to record and playback audio files on a device.

Using Media

As with all the other Cordova plugins, the first thing we need to do is to install it from the command prompt window.
C:\Users\Username\Desktop\MyApp>cordova plugin add cordova-plugin-media
Now, we are ready to use the plugin. In the following code sample, src is the source mp3 file that we will use for this tutorial. It is placed in js folder, but we need to add /android_asset/www/ before it, so it can be used on android devices.
The complete functionality is wrapped inside the $ionicPlatform.ready()function to assure that everything is loaded before the plugin is used. After that, we are creating the media object by using the newMedia(src) method. The media object is used for adding play, pause, stop and release functionalities.

Controller Code

.controller('MyCtrl', function($scope, $ionicPlatform, $cordovaMedia) {

   $ionicPlatform.ready(function() {
      var src = "/android_asset/www/js/song.mp3";
      var media = $cordovaMedia.newMedia(src);

      $scope.playMedia = function() {
         media.play();
      };

      $scope.pauseMedia = function() {
         media.pause();
      };

      $scope.stopMedia = function() {
         media.stop();
      };

      $scope.$on('destroy', function() {
         media.release();
      });

   });
}
We will also create three buttons for calling play, pause and stop functions.
<button class = "button" ng-click = "playMedia()">PLAY</button>

<button class = "button" ng-click = "pauseMedia()">PAUSE</button>

<button class = "button" ng-click = "stopMedia()">STOP</button>
We need to run it on an emulator or a mobile device for this plugin to work. When the user’s tap on the play button, the song.mp3 will start playing.
You can see in the above example that we use src as an option parameter. There are other optional parameters that can be used for the newMediamethod.

Optional Parameters

The following table will show all the optional parameters available.
ParameterTypeDetails
mediaSuccessfunctionCalled after current play/record or stop action has completed.
mediaErrorfunctionInvoked when there is an error.
mediaStatusfunctionInvoked to show status changes.
The next table will show all the methods available.

Available Methods

The following table will show all the methods available.
MethodParametersDetails
newMedia(parameter1)srcReturns media object that will be used for future methods. src is an URI of the audio content.
getCurrentPosition/Returns the current position within an audio file.
getDuration/Returns the duration of an audio file.
play/Used to start or resume playing.
pause/Used to pause playback.
stop/Used to stop playing.
release/Used to release audio resources.
seekTo(parameter1)millisecondsUsed to set the playback position in milliseconds.
setVolume(parameter1)volumeUsed to change volume. Range is from 0 to 1
startRecord()/Used to start recording.
stopRecord/Used to stop recording.

Ionic - Cordova Geolocation

This plugin is used for adding a geolocation plugin to the Ionic app.

Using Geolocation

There is a simple way to use the geolocation plugin. We need to install this plugin from the command prompt window.
C:\Users\Username\Desktop\MyApp>cordova plugin add cordova-plugin-geolocation
The following controller code is using two methods. The first one is the getCurrentPosition method and it will show us the current latitude and longitude of the user’s device. The second one is the watchCurrentPositionmethod that will return the current position of the device when the position is changed.

Controller Code

.controller('MyCtrl', function($scope, $cordovaGeolocation) {
   var posOptions = {timeout: 10000, enableHighAccuracy: false};
   $cordovaGeolocation
   .getCurrentPosition(posOptions)
 
   .then(function (position) {
      var lat  = position.coords.latitude
      var long = position.coords.longitude
      console.log(lat + '   ' + long)
   }, function(err) {
      console.log(err)
   });

   var watchOptions = {timeout : 3000, enableHighAccuracy: false};
   var watch = $cordovaGeolocation.watchPosition(watchOptions);
 
   watch.then(
      null,
  
      function(err) {
         console.log(err)
      },
  
      function(position) {
         var lat  = position.coords.latitude
         var long = position.coords.longitude
         console.log(lat + '' + long)
      }
   );

   watch.clearWatch();
})
You might have also noticed the posOptions and watchOptions objects. We are using timeout to adjust maximum length of time that is allowed to pass in milliseconds and enableHighAccuracy is set to false. It can be set to trueto get the best possible results, but sometimes it can lead to some errors. There is also a maximumAge option that can be used to show how an old position is accepted. It is using milliseconds, the same as timeout option.
When we start our app and open the console, it will log the latitude and longitude of the device. When our position is changed, the lat and long values will change.

Ionic - Cordova Native Audio

This plugin is used for adding native audio sounds to the Ionic app.

Using Native Audio

To be able to use this plugin, we first need to install it. Open the command prompt window and add the Cordova plugin.
C:\Users\Username\Desktop\MyApp>cordova plugin add cordova-plugin-nativeaudio
Before we start using this plugin, we will need audio file. For simplicity, we will save our click.mp3 file inside the js folder, but you can place it wherever you want.
The next step is to preload the audio file. There are two options available, which are −
  • preloadSimple − It is used for simple sounds that will be played once.
  • preloadComplex − It is for sounds that will be played as looping sounds or background audio.
Add the following code to your controller to preload an audio file. We need to be sure that the Ionic platform is loaded before we can preload the audio file.

Controller Code

$ionicPlatform.ready(function() {
   $cordovaNativeAudio
   .preloadSimple('click', 'js/click.mp3')
 
   .then(function (msg) {
      console.log(msg);
   }, function (error) {
      console.log(error);
   });

   $cordovaNativeAudio.preloadComplex('click', 'js/click.mp3', 1, 1)
 
   .then(function (msg) {
      console.log(msg);
   }, function (error) {
      console.error(error);
   });
});
In the same controller, we will add code for playing audio. Our $timeoutfunction will stop and unload looping audio after five seconds.
$scope.playAudio = function () {
   $cordovaNativeAudio.play('click');
};

$scope.loopAudio = function () {
   $cordovaNativeAudio.loop('click');

   $timeout(function () {
      $cordovaNativeAudio.stop('click');
      $cordovaNativeAudio.unload('click');
   }, 5000);
}
The last thing we need is to create buttons for playing and looping audio.

HTML Code

<button class = "button" ng-click = "playAudio()">PLAY</button>

<button class = "button" ng-click = "loopAudio()">LOOP</button>
When we tap on play button, we will hear the sound once and when we tap on the loop button, the sound will loop for five seconds and then stop. This plugin works only on an emulator or a mobile device.

Ionic - Cordova InAppBrowser

The Cordova InAppBrowser plugin is used to open external links from your app inside a web browser view.

Using Browser

It is very easy to start working with this plugin. All you need to do is to open the command prompt window and install the Cordova plugin.
C:\Users\Username\Desktop\MyApp>cordova plugin add org.apache.cordova.inappbrowser
This step allows us to start using the inAppBrowser. We can now create a button that will lead us to some external link, and add a simple function for triggering the plugin.

HTML Code

<button class = "button" ng-click = "openBrowser()">OPEN BROWSER</button>

Controller Code

.controller('MyCtrl', function($scope, $cordovaInAppBrowser) {

   var options = {
      location: 'yes',
      clearcache: 'yes',
      toolbar: 'no'
   };

   $scope.openBrowser = function() {
      $cordovaInAppBrowser.open('http://ngcordova.com', '_blank', options)
  
      .then(function(event) {
         // success
      })
  
      .catch(function(event) {
         // error
      });
   }
})
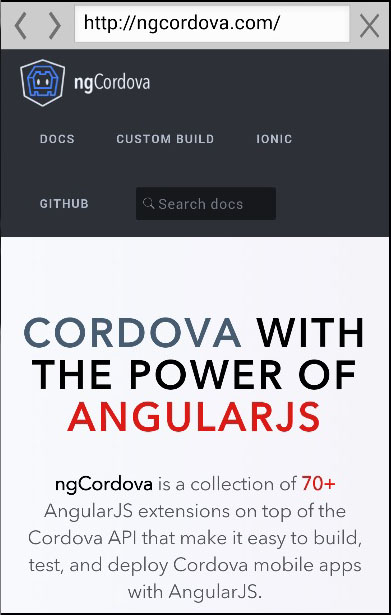
When the user taps the button the InAppBrowser will open the URL we provided.
Ionic Cordova InAppBrowser
Several other methods can be used with this plugin, some of which are in the following table.

Cordova $inAppBrowser Methods

MethodParametersTypeDetails
setDefaultOptions(parameter1)optionsobjectUsed to set global options for all InAppBrowsers.
open(parameter1, parameter2, parameter3)URL, target, optionsstring, string, objectThere are three targets available. _blank will open new inAppBrowser instance. _systemwill open system browser and _selfwill use current browser instance.
close//Used to close InAppBrowser.

Cordova InAppBrowser Events

This plugin also offers events that can be combined with $rootScope.
ExampleDetails
$rootScope.$on('$cordovaInAppBrowser:loadstart', function(e, event));Called when inAppBrowser start loading the page.
$rootScope.$on('$cordovaInAppBrowser:loadstop', function(e, event));Called when inAppBrowser has finished loading the page.
$rootScope.$on('$cordovaInAppBrowser:loaderror', function(e, event));Called when inAppBrowser has encountered error.
$rootScope.$on('$cordovaInAppBrowser:exit', function(e, event));Called when inAppBrowser window is closed.

Ionic - Cordova Facebook

This plugin is used for connecting to Facebook API. Before you start integrating Facebook, you need to create a Facebook app here. You will create a web app and then skip the quick start screen. Then, you need to add the website platform on the settings page. You can use the following code snippet for the site URL while in development.
http://localhost:8100/
After that, you need to add Valid OAuth redirect URIs on the settings/advanced page. Just copy the following two URLs.
https://www.facebook.com/connect/login_success.html
http://localhost:8100/oauthcallback.html

Installing Facebook Plugin

We did all the steps above to tackle some issues that often appear when using this plugin. This plugin is hard to set up because there are a lot of steps involved and documentation doesn't cover all of them. There are also some known compatibility issues with other Cordova plugins, so we will use Teleric verified plugin version in our app. We will start by installing browser platform to our app from the command prompt.
C:\Users\Username\Desktop\MyApp>ionic platform add browser
Next, what we need to do is to add the root element on top of the body tag in index.html.

index.html

<div id = "fb-root"></div>
Now we will add Cordova Facebook plugin to our app. You need to change APP_ID and APP_NAME to match the Facebook app you created before.
C:\Users\Username\Desktop\MyApp>cordova -d plugin add 
   https://github.com/Telerik-Verified-Plugins/Facebook/ 
   --variable APP_ID = "123456789" --variable APP_NAME = "FbAppName"
Now open index.html and add the following code after your body tag. Again you need to make sure that the appId and version are matching the Facebook app you created. This will ensure that Facebook SDK is loaded asynchronously without blocking the rest of the app.

index.html

<script>
   window.fbAsyncInit = function() {
      FB.init({
         appId      : '123456789',
         xfbml      : true,
         version    : 'v2.4'
      });
   };

   (function(d, s, id) {
      var js, fjs = d.getElementsByTagName(s)[0];
      if (d.getElementById(id)) {return;}
      js = d.createElement(s); js.id = id;
      js.src = "//connect.facebook.net/en_US/sdk.js";
      fjs.parentNode.insertBefore(js, fjs);
   }(document, 'script', 'facebook-jssdk'));
</script>

Angular Service

Since we installed everything, we need to create service that will be our connection to the Facebook. These things can be done with less code inside the controller, but we try to follow the best practices, so we will use Angular service. The following code shows the entire service. We will explain it later.

services.js

.service('Auth', function($q, $ionicLoading) {

   this.getLoginStatus = function() {
      var defer = $q.defer();

      FB.getLoginStatus(function(response) {
  
         if (response.status === "connected") {
            console.log(JSON.stringify(response));
         } else {
            console.log("Not logged in");
         }
      });

      return defer.promise;
   }
   
   this.loginFacebook = function() {
      var defer = $q.defer();

      FB.login(function(response) {
  
         if (response.status === "connected") {
            console.log(JSON.stringify(response));
         } else {
            console.log("Not logged in!");
         }
      });

      return defer.promise;
   }

   this.logoutFacebook = function() {
      var defer = $q.defer();

      FB.logout(function(response) {
         console.log('You are logged out!');
      });

      return defer.promise;
   }

   this.getFacebookApi = function() {
      var defer = $q.defer();

      FB.api("me/?fields = id,email", [], function(response) {
  
         if (response.error) {
            console.log(JSON.stringify(response.error));
         } else {
            console.log(JSON.stringify(response));
         }
      });

      return defer.promise;
   }
});
In the above service, we are creating four functions. First three are self-explanatory. The fourth function is used for connecting to Facebook graph API. It will return the id and email from the Facebook user.
We are creating promise objects to handle asynchronic JavaScript functions. Now we need to write our controller that will call those functions. We will call each function separately for better understanding, but you will probably need to mix some of them together to get the desired effect.

Controller Code

.controller('MyCtrl', function($scope, Auth, $ionicLoading) {

   $scope.checkLoginStatus = function() {
      getLoginUserStatus();
   }

   $scope.loginFacebook = function(userData) {
      loginFacebookUser();
   };

   $scope.facebookAPI = function() {
      getFacebookUserApi();
   }

   $scope.logoutFacebook = function() {
      logoutFacebookUser();
   };

   function loginFacebookUser() {
      return Auth.loginFacebook();
   }

   function logoutFacebookUser() {
      return Auth.logoutFacebook();
   }

   function getFacebookUserApi() {
      return Auth.getFacebookApi();
   }

   function getLoginUserStatus() {
      return Auth.getLoginStatus();
   }
})
You are probably wondering why didn't we returned Auth service directly from the function expressions (first four functions). The reason for this is that you will probably want to add some more behavior after the Auth function is returned. You might send some data to your database, change the route after login, etc. This can be easily done by using JavaScript then() method to handle all the asynchronous operations instead of callbacks.
Now we need to allow users to interact with the app. Our HTML will contain four buttons for calling the four functions we created.

HTML Code

<button class = "button" ng-click = "loginFacebook()">LOG IN</button>
<button class = "button" ng-click = "logoutFacebook()">LOG OUT</button>
<button class = "button" ng-click = "checkLoginStatus()">CHECK</button>
<button class = "button" ng-click = "facebookAPI()">API</button>
When the user taps the LOG IN button, the Facebook screen will appear. The user will be redirected to the app after the login is successful.
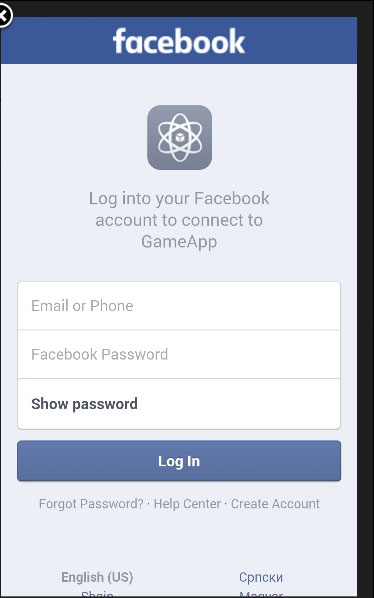
Ionic Cordova Facebook